Loading the model…
Drag to rotate, scroll or pinch to zoom, right-drag to pan. All measurements are in millimetres.
Dimensioned drawings
Projected from the same 3D model, so they always match it. Select a drawing to open it full size.
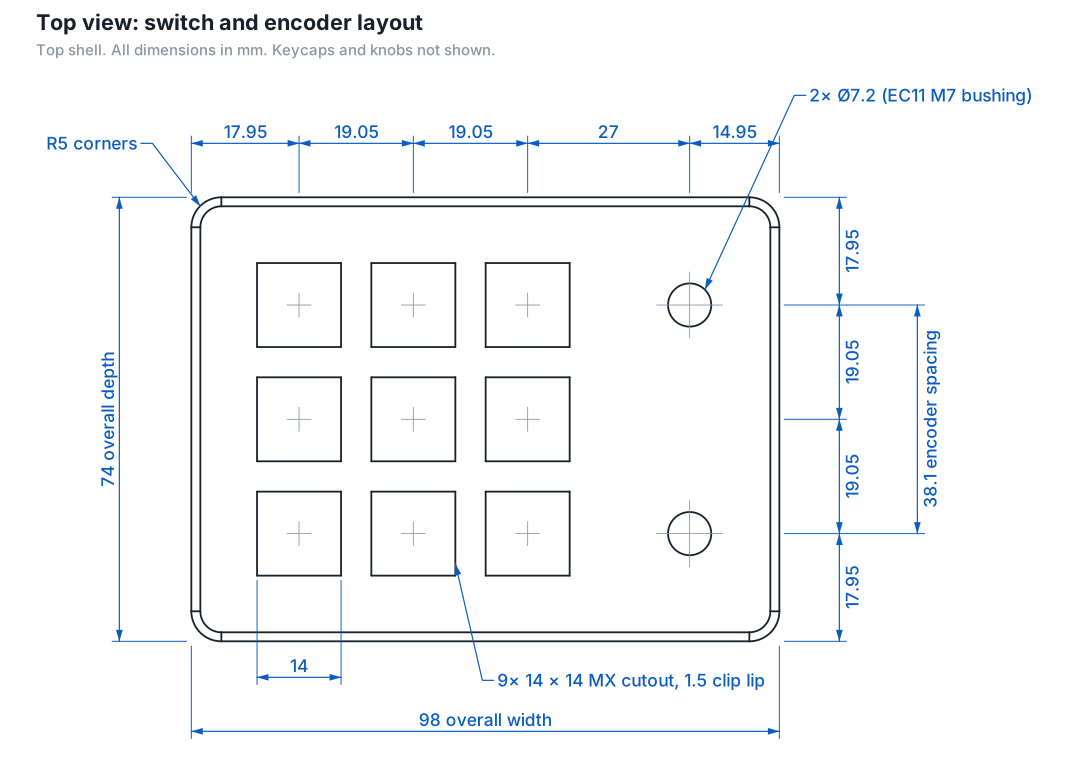
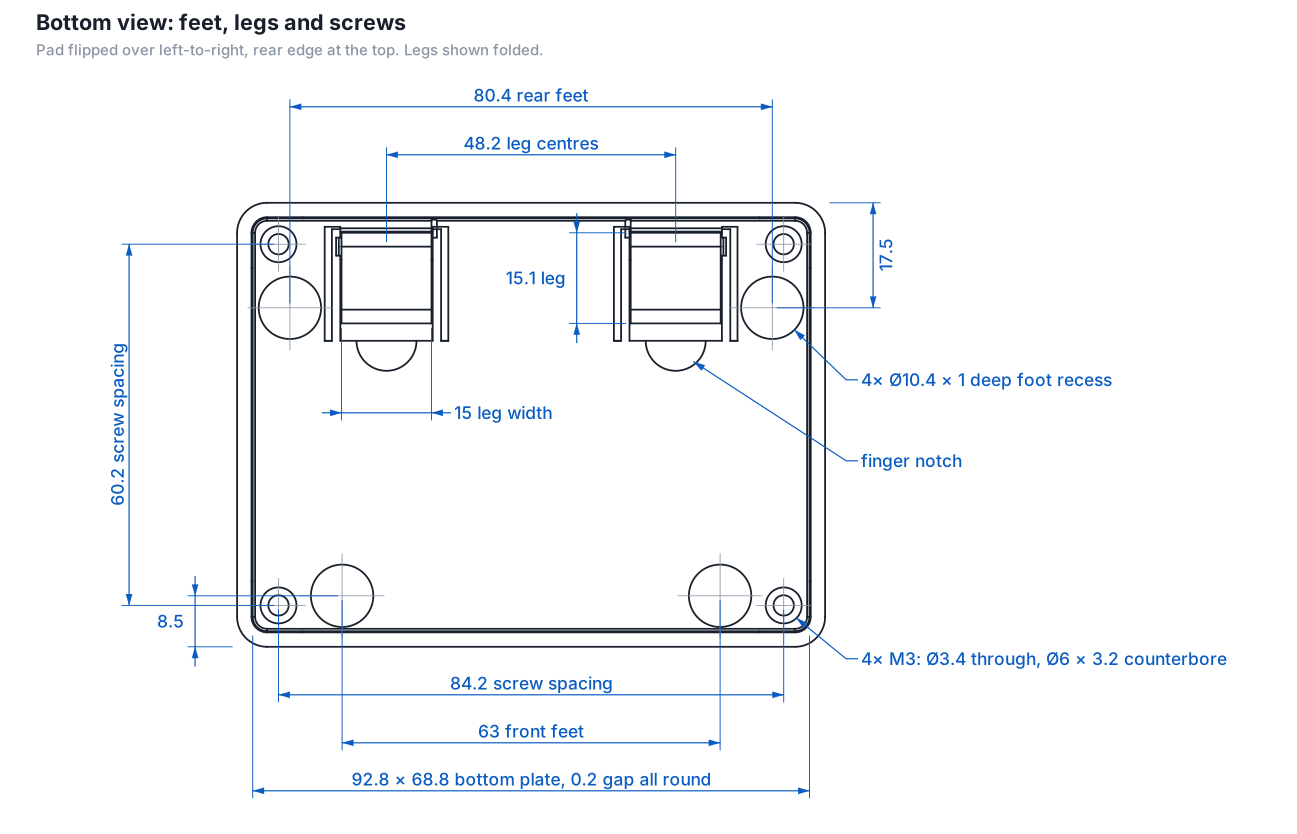
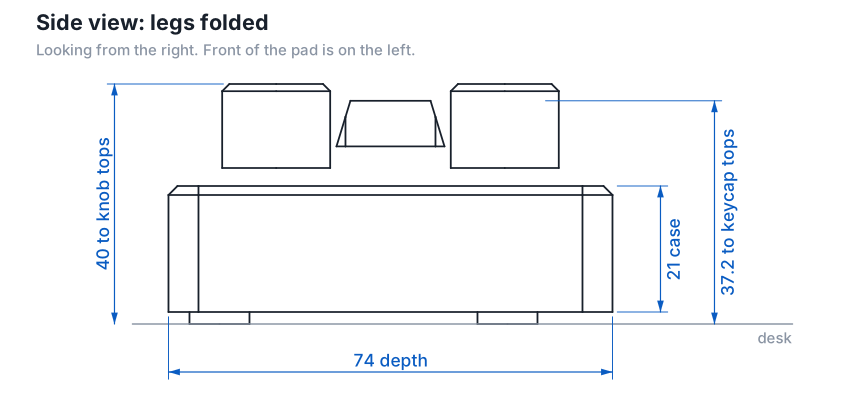
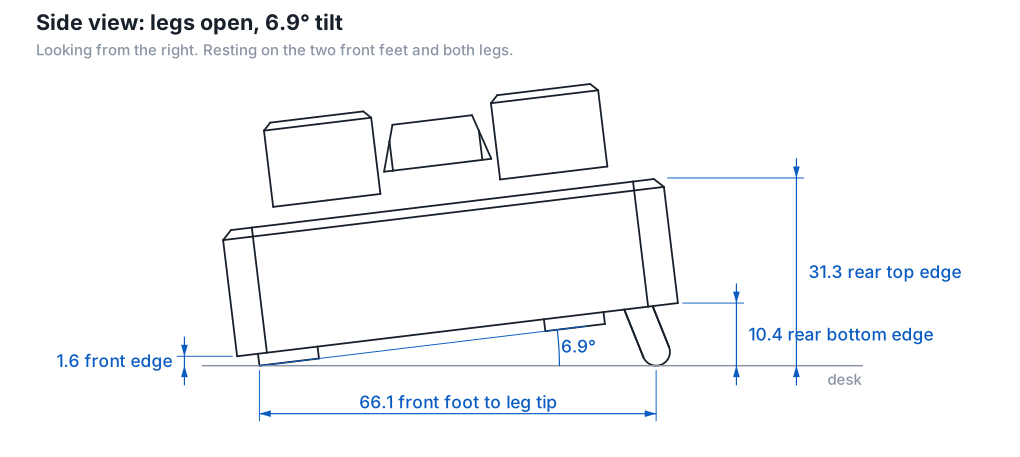
Key numbers
| Outside size | × × mm |
|---|---|
| Height to keycap tops | mm from the desk |
| Height to knob tops | mm from the desk |
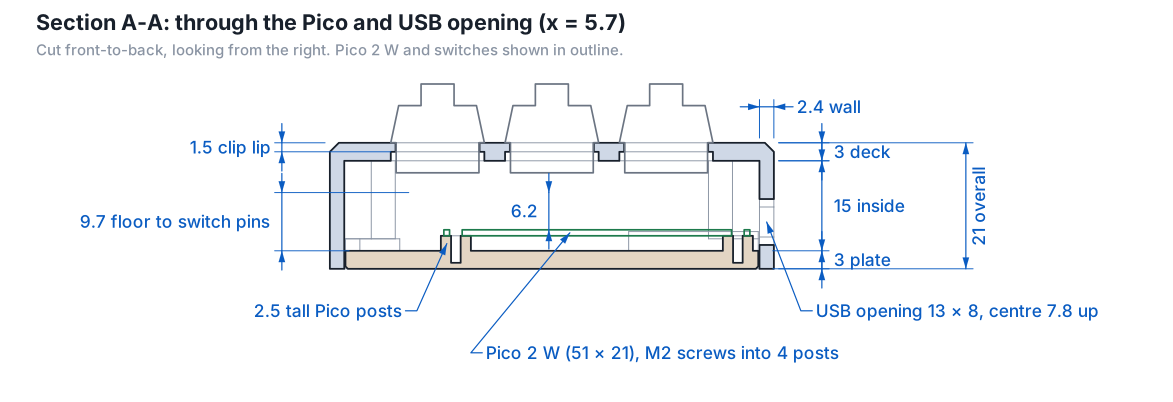
| Switch cutouts | 9 × mm square, mm clip lip, mm pitch |
| Encoder holes | 2 × Ø mm, mm apart, mm right of the last key column |
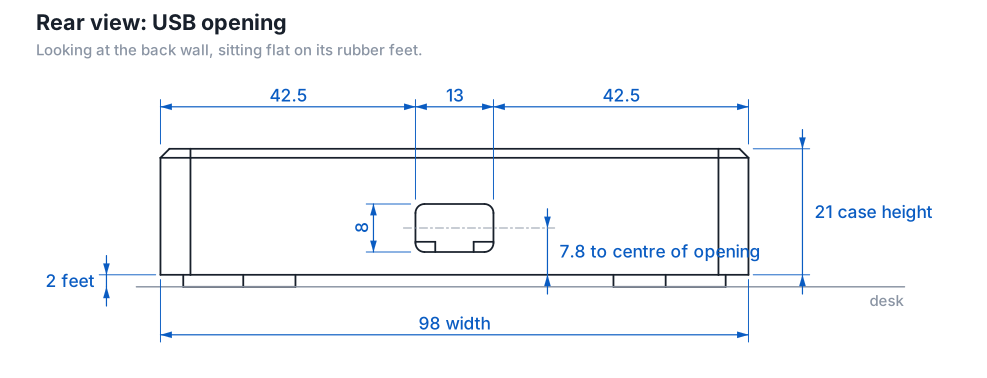
| USB opening | × mm, centred on the rear wall, centre mm up |
| Walls / deck / base | / / mm |
| Rubber feet | 4 recesses, Ø × mm deep |
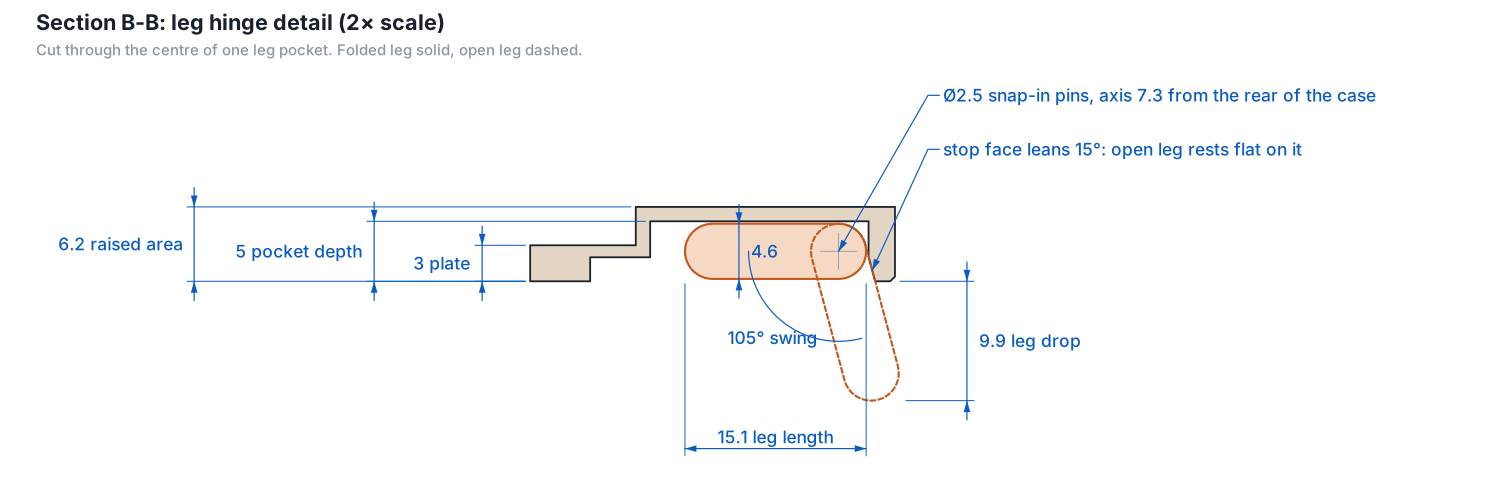
| Legs | × × mm, swing ° to a hard stop |
| Tilt with legs open | °; rear edge sits mm above the desk ( mm when flat) |
| Room under the switches | mm between the Pico and the switch pins |
What goes in it
- 9 Cherry MX-style switches, plate mount, with 1u keycaps
- 2 EC11 encoders with an M7 threaded bushing, nut and washer; knobs up to 24 mm fit
- Raspberry Pi Pico 2 W on four posts, 4 × M2 × 5 self-tapping screws
- 4 × M3 heat-set inserts (5.7 mm long, 4.6 mm knurl) and 4 × M3 × 8 socket-head screws
- 4 × 10 mm round stick-on rubber feet, about 3 mm tall
Printing
- Top shell: upside down, deck on the bed. No supports.
- Bottom plate: desk side down. The leg pockets bridge about 20 mm; add support there if your printer sags.
- Legs (print 2): flat. They snap in from below and stay put by friction.
- PETG is the safer choice for the bottom plate, because the leg sockets flex when the legs snap in.
Check before printing
- The model is checked in software only: every part is a valid solid and nothing collides. It has not been printed.
- Measure your encoder body. The pocket under the deck is 12.8 mm square.
- Measure your USB cable's moulded plug. It has to pass through the 13 × 8 mm opening.
- The Pico's BOOTSEL button can't be reached once the case is closed. Flash it first, or use firmware that can reboot into the bootloader.